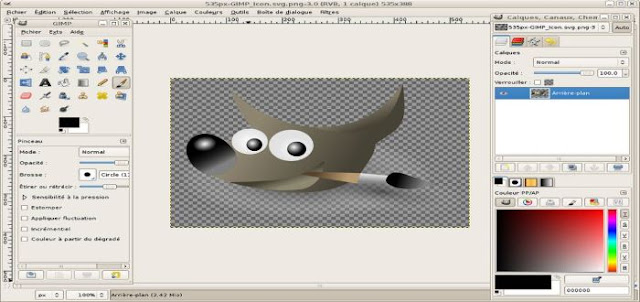
Components of the GIMP interface
- Tool box.
- Selection Tools.
- Transformation Tools.
- Paint Tools.
- Filters.
Gimp is a free, open source image editing platform. This program has a lot of image editing options, for those working in the field of photography, drawing or illustrator , and can also use image illustration techniques, remove or add elements, etc., this program is available on many operating systems GNU/Linux, Windows and macOS.
Tool box :
One of the components of the gimp interface, for editing images, when the program is opened, the toolbox appears. If you choose the language of the program English, it will be the Tool box, which is spread throughout the program. At the top there are icons such as File, Help Help, Edit, Tools, Filters and other menus, as each one contains a set of commands and options for various modifications to the images, and this is what we will explain in detail below.
Selection tools :
The following is an explanation of each selection or selection tool, or in English on the Selection tools program:
- Rectangle Select: It is a simple choice to select a specific part of the image in the form of a rectangle, while holding the left side of the mouse and then dragging it by clicking Shift, four squares appear on the sides of the selected part, in each box you can add an element, color, or even Modification of the existing image.
- Ellipse select: Like the rectangle selection, it is used to select the parts of the image to be modified, and it is selected in an oval or circular shape, in the same way as the previous one except for pressing the Shift button.
- Manual selection tool: It is also a selection tool but manually, as if it were hand-drawn lines, and once you stop using this tool, the program connects the start point and end point with a straight line, it is better to use this tool after enlarging the image.
- The Magic Wand: It is the selection of parts of the image by the similarity of colors in the pixels that make up the image, pressing the magic wand, then selecting the part in the image and then pressing Shift, if the default settings of the image are not suitable, you can modify it through the image dimensions adjustment boxes Shown under the Magic Wand Tool.
- Bezier Curves Tool: It is a tool that enables you to easily and effortlessly, to capture specific small or large portions of the image to be modified, and through the points you place on the tool on the selected portion, you can change the paths and directions of the selected portions or elements.
- Scissor tool: Once you click on a selection of scissors or scissor, and go to use it on the image, it draws a selection on the color or on the bright edges.
Transformation Tools :
- This tool cuts images into pieces by moving them in different directions with the mouse.
- Magnifying glass tool to manually enlarge or reduce the image, by clicking on it with the mouse, or the appropriate sizes of the image can be adjusted through the numbers that appear on the magnification, and the same feature can also be used to reduce, Zoom In to enlarge, Zoom out to reduce.
- The Crop tool is used to select the image, cut off unwanted parts, or select certain frames.
Paint Tools :
- T list: Through the tools menu, we choose the letter T to add text on the image to be modified, not only that, but specifying the font size and writing angle.
- Choosing a caliper or a mantle: It is a tool provided by the program to measure angles and distances accurately.
- Finger Icon: This finger is responsible for distributing color on the image and is also a tool for creating fun effects on the image.
- Dry pen: This pen is used for drawing and also for writing, and through the Tool Setting menu, you can modify and adjust the shape of the pen according to the things you want to apply to the image.
- The Convolver Tool: This tool is used to blur, obscure, or blur any parts of the image, as well as professionally blur or separate the edges.
Filters : This icon allows users to use different visual effects and filters , such as blur image, map, animation and other options, to transform the image or add a decoration or custom direction to it, and through the Preview button, you can view the modifications before deciding to save them.
Components of the GIMP interface, picture windows
Yes , one of the components of the GIMP interface is the image windows.
Through the Image or Image windows menu, you can enter more than one image for the program and switch between them easily, in addition to having a lot of other options for modification, such as cropping, duplicating the image, changing the image spaces and spaces, printing it, choosing the types and angles of writing lines and creating windows or side lines. And so on.
How to download gimp
- For computers: Please click on the following link , in order to get a copy of GIMP photo-editing program.
- For Android phones: Through the following link, you can get the GIMP program for $1.99.
- For Apple: Please visit this link , to download the program for free, or for $99 without ads.


Post a Comment